- Home
- All Cabinets
- Almond Green
- Almond Grey
- Aquamarine Shaker
- Black Shaker
- British Chai
- Cabernet Sauvignon
- Cashmere Grey
- Cashmere Grey Shaker
- Charcoal Black
- Chocolate Shaker
- Chrysler Chalk
- Chrysler Sage
- Cider Brown
- Classic Gray
- Classic Ivory
- Classic White
- Cream Shaker
- Crystal Aged Tobacco
- Crystal Butterscotch
- Crystal Navy
- Crystal Taupe
- Crystal Vanilla
- Crystal White
- Deco Black
- Deco Marine
- Deco White
- Desert Sand Shaker
- Dove Shaker
- Dusty Blue Shaker _
- Espresso Shaker
- European White
- Farmhouse Grey
- Farmhouse Maple
- Farmhouse Storm
- Farmhouse Taupe _
- Florence White
- Frosted Beech
- Frosted Gray
- Frosted White
- Hazelnut Roast
- Hickory Shaker
- Ice Gray
- Inset Linen White
- Ivory White
- Maple Shaker
- Modern Maple Shaker
- Modern White
- Moonlight Gray
- Moonlight Java
- Navy Blue Shaker
- Olive Gray
- Paris Gray
- Phantom Gray
- Phantom Gray Crystal
- Phantom Gray Shaker
- Phantom Gray Square
- Roman Toffee
- Royal Blue Shaker
- Saldana Cherry
- Santorini White
- Savana Toffee
- Sicilian Black
- Sicilian Blue
- Sicilian Bourbon
- Sicilian Grey
- Sicilian Oak
- Sicilian White
- Sicilian Whitebarn
- Slim Shaker Black
- Slim Shaker Green
- Slim Shaker Oak Bianco
- Slim Shaker Thunder Grey
- Slim Shaker White
- Slim Shaker White oak
- Steel Gray
- Storm Gray
- Storm Phantom Grey
- Storm White Shaker
- Uptown Espresso
- Uptown Gray
- Uptown White
- Vanilla Shaker
- Venetian Charcoal Black
- Venetian White _
- Whiskey Oak Shaker
- White Oak Shaker
- White Shaker
- XR - Barbie Pink Diamond
- XR - Barbie Pink Shaker
- XR - Barbie Pink Slim Shaker
- XR - Black Diamond
- XR - Black Shaker
- XR - Burgundy Maroon Diamond
- XR - Burgundy Maroon Shaker
- XR - Burgundy Maroon Slim Shaker
- XR - Clementine Orange Diamond
- XR - Clementine Orange Shaker
- XR - Clementine Orange Slim Shaker
- XR - Country Green Diamond
- XR - Country Green Shaker
- XR - Country Green Slim Shaker
- XR - Emerald Green Diamond
- XR - Emerald Green Shaker
- XR - Lavender Musk Diamond
- XR - Lavender Musk Shaker
- XR - Lavender Musk Slim Shaker
- XR - Mustard Yellow Diamond
- XR - Mustard Yellow Shaker
- XR - Mustard Yellow Slim Shaker
- XR - Ocean Breeze Diamond
- XR - Ocean Breeze Shaker
- XR - Ocean Breeze Slim Shaker
- XR - Peach Blush Diamond
- XR - Peach Blush Shaker
- XR - Peach Blush Slim Shaker
- XR - Powder Pink Diamond
- XR - Powder Pink Shaker
- XR - Powder Pink Slim Shaker
- XR - Purple Frost Diamond
- XR - Purple Frost Shaker
- XR - Purple Frost Slim Shaker
- XR - Purple Rain Diamond
- XR - Purple Rain Shaker
- XR - Purple Rain Slim Shaker
- XR - Sage Green Diamond
- XR - Sage Green Shaker
- XR - SunGold Yellow Diamond
- XR - SunGold Yellow Shaker
- XR - SunGold Yellow Slim Shaker
- XRZ - Barbie Pink
- XRZ - Burgundy Maroon
- XRZ - Clementine Orange
- XRZ - Country Green
- XRZ - Lavender Musk
- XRZ - Mustard Yellow
- XRZ - Ocean Breeze
- XRZ - Peach Blush
- XRZ - Powder Pink
- XRZ - Purple Frost
- XRZ - Purple Rain
- XRZ - SunGold Yellow
- Y-Series Gatsby Dove
- Y-Series Gatsby Sage
- Y-Series Gatsby Taupe
- Y-Series Red Oak
- Y-Series Rift Red Oak
- Y-Series Rift White Oak
- Y-Series Slim Shaker Maple
- Y-Series Slim Shaker Rift White Oak
- Y-Series Slim Shaker Vanilla
- Y-Series White Oak
- Z-Series Black Bourbon
- Z-Series Blue Sage Satin
- Z-Series Brilliant Ivory Glossy
- Z-Series Brilliant Purple Glossy
- Z-Series Brilliant White Glossy
- Z-Series Casablanca
- Z-Series Charcoal Blue Oak
- Z-Series Chestnut Brown
- Z-Series Drift Sand
- Z-Series Egyptian Green Satin
- Z-Series European Bamboo
- Z-Series European Beech
- Z-Series European Maple
- Z-Series Fairy White
- Z-Series Farmhouse Oak
- Z-Series Farmhouse Teak
- Z-Series Forest Black
- Z-Series Forest Grey
- Z-Series French Distress
- Z-Series Hickory Charcoal
- Z-Series Linen Brown
- Z-Series Linen Gray
- Z-Series Matte Almond Cream
- Z-Series Matte Black
- Z-Series Matte Blue Sail
- Z-Series Matte Charcoal Black
- Z-Series Matte Cotton White
- Z-Series Matte Peacock Green
- Z-Series Matte Powder Grey
- Z-Series Metallic Leather
- Z-Series Metallica
- Z-Series Midnight Black Glossy
- Z-Series Milan Gray
- Z-Series Oak Bianco
- Z-Series Oak Natural
- Z-Series Oak Sonoma
- Z-Series Pine Green Satin
- Z-Series Red Oak
- Z-Series River Blue Glossy
- Z-Series Ruby Red Glossy
- Z-Series Saddle Wood
- Z-Series Sage Green Satin
- Z-Series Silver Chrome Glossy
- Z-Series Silver Gray Glossy
- Z-Series Smoke Teak
- Z-Series Smoke Walnut
- Z-Series Thunder Gray Glossy
- Z-Series Tiger Wood Glossy
- Z-Series Tobacco Cedar
- Z-Series Vintage Walnut
- Z-Series White Oak
- Z-Series White Pine
- Z-Series White Sand
- Z-Series White Satin
- Z-Series Wild Cypress
- CABINET COMPARISON
- White Cabinets
- Grey Cabinets
- Modern Cabinets
- Black Cabinets
- Blue Cabinets
- Taupe Cabinets
- Painted Cabinets
- Shaker Cabinets
- Matte Cabinets
- Black & White Cabinets
- Blue & White Cabinets
- Grey & White Cabinets
- Green Cabinets
- Frameless Cabinets
- Mid Century Cabinets
- FarmHouse Cabinets
- Red Cabinets
- Bamboo Cabinets
- Stained Cabinets
- Espresso Cabinets
- Oak Cabinets
- Maple Cabinets
- Cinnamon Cabinets
- Cherry Cabinets
- Brown Cabinets
- Antique Cabinets
- Budget Cabinets
- Off White
- Natural Wood Cabinets
- Distressed Cabinets
- Cream Cabinets
- Hickory Cabinets
- Slim Shaker Cabinets
- Garage Cabinets
- Inset Cabinets
- Pink Cabinets
- Yellow Cabinets
- Orange Cabinets
- Purple Cabinets
- Burgundy Cabinets
- Kitchen
- Gallery
- Style Test
- Design 1,2,3
- Free Sample
- ASSEMBLY HELP
- Contact Us
Re-facing Kitchen Cabinets Made Easy: In Simple Steps
Kitchen cabinet is one of the chief elements constituting any sophisticated and beautiful kitchen. The aesthetic beauty of any house is well related with the kitchen today. A thoughtfully architected kitchen contributes to a luxurious and well-designed look of your home. The kitchen is all about clutter of cooking assisters and organization is the key to sophistication. Kitchen cabinets aggregate all of them inside and become a part of reflecting cleanliness. The surface of these cabinets is ought to grow dull with time and demand replacement. RTA kitchen cabinets provide some of the superior cabinet options for you. But replacing entire cabinet is a costly affair and one is forced to venture in reasonable options like re-facing.
Re-facing is a technique to replace the exteriors of the entire cabinet with veneer and giving a new look. Re-facing is a successful mechanism but one should explore all the possibilities. There may be a few like:
1. Replacing
Chances are that the cabinet that you created when you started your journey in this new home is near its expiry date. Get a reality check. In the greed of saving money, you may spend little for the touch-ups. But your cabinet may not last long and the little money that you spent last will be gone. So, take a wise decision. Take a look at RTA kitchen cabinets. Your search may end here.
2. Remodeling
You may not realize, but your taste may have changed with time. Maybe you are bored with the look of the kitchen and are in need of change. Re-facing may not help you. It is time for remodeling and re-structuring. Get a few things added; make some adjustments and then a touch up like painting or sticking wallpapers. That is all you need. A re-facing here will only be discouraging and mistake.
3. Re-facing
You are well aware that your cabinet is in good condition but the exterior has faced some wear and tear. This has brought down the face value of your kitchen. It may happen that after a certain while you are not happy with your lamination and your heart knows what mood you want your kitchen into. Simply do Re-facing, have fun and enjoy your new kitchen.
Many take re-facing as a challenge and do it them. It is not a very difficult technique but will demand your patience and time. Mostly considered a DIY activity, there are a few simple and necessary steps that should be followed. The major steps are listed below
- Dissemble
The first basic step starts with dissembling. Dissemble all the doors of the cabinets and keep them aside. Collect all the handles and hinges separately if you are planning to re-use them. Reusing is a simple and pocket-friendly option, but, don't forget that you are planning to get reface done. Better get an entirely new look with new accessories. Detach the existing laminates.
- Cleaning
When a cabinet is furnished with laminates, it undergoes a layering of adhesives. After detaching existing laminates, the rough surface exposed to adhesives needs to be resurfaced. The target is to make this surface reusable for application of adhesive. Rub the surfaces with sandpaper to make them irritant-free, smooth and plain. Then, clean the dust with tack cloth. Now the exposed surface is ready for any application.
- Cutting
With measuring tape or ruler, take the measurement of the sides of the cabinet. Cut the veneer to the appropriate size. Focus on the length and width. The veneer is allowed to be longer than the sides but not shorter.
- Sticking
Apply adhesive to the interior of veneer and stick on the sides of the cabinet. Try sticking first at the least visible areas as first few hands will take time to get accustomed. After sticking veneer, make it firm with two nails. Fill the holes created by the nails with wood putty of matching the color. Then, press throughout forcibly over it with the wooden block. This pressing sticks the veneer properly and eradicates all the air bubbles. Now, take the utility knife and trim the extra veneer to make it perfect in size. Apply the same procedure on cabinet doors as well.
- Assemble
With the veneer stuck on all the exteriors, now the final moment of assembling starts. Drill holes in the cabinet doors for hinges and handles. Attach the doors with hinges. Finally, attach the handles. The work is done. Leave it for some time and let the adhesive dry.
Conclusion
You can also apply Polyurethane coating on the veneers for the longevity. That totally depends on your budget. Re-facing is the best solution for those who want to shed less money and change the basic layout. While selecting veneer, you can explore different looks of the kitchen in the catalogs of RTA Kitchen cabinets. It can help you in selection. The Beautiful kitchen is an asset for a beautiful home. Re-face your kitchen not only for the feeling of new but add a new theme to your life. Live your house rather than living in it.
How to Blend Mid-Century Modern Cabinets with Contemporary Design?
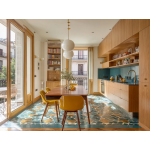
Want a kitchen that feels both retro and modern? Learn how to blend mid-century modern kitchen cabinets with today’s sleek, functional design....
How To Brighten Small Kitchens with White Cabinets (and a Little Color)
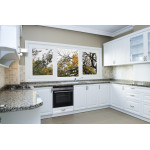
Brighten small kitchens with white kitchen cabinets. Learn design tips, wall colors, and storage hacks to make compact spaces feel airy and stylish....
5 Cabinet Features That Make Farmhouse Kitchens Feel Fresh in 2025
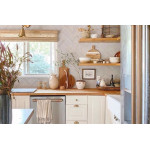
From slim shakers to ceiling-height storage, discover 5 unique cabinet features redefining style for modern farmhouse kitchens in 2025....
How To Tweak Your Space with Oak Kitchen Cabinets
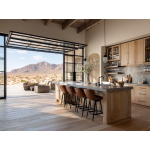
Explore practical ways to transform your kitchen with oak kitchen cabinets. These tips can enhance your kitchen’s style, functionality, and aesthetics....
How do you blend different cabinet designs like a pro?
Learn how to blend different kitchen cabinet designs like a pro. Discover tips for mixing colors, styles, and finishes for a cohesive, stylish kitchen....

